Ac Motorhomes Installing in minibuses or vans is a highly specialized project requiring meticulous planning. However, Busclima will tell you that in China, a skilled auto mechanic can install Ac Motorhomes proficiently after simple training. And this worker doesn’t need a university education.
Below, Busclima explains the complete Ac Motorhomes installation process:
Phase 1: Planning Before Ac Motorhomes Installation
Air Conditioning Selection and Calculation
1. Based on the vehicle’s interior space (length × width × height, cubic meters), estimate at 60-70 BTU/h per cubic meter. A standard long-wheelbase, high-roof Ford Transit/Van requires approximately 9,000 – 13,500 BTU/h of air conditioning.
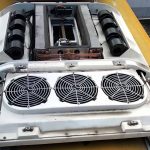
2. A DC inverter rooftop RV ac is the only recommended option. It is energy-efficient, quiet, and battery-friendly. For Ac Motorhomes design and installation, visit www.busclima.com or contact busclima@kingclima.com for more technical support. 3. Note the overall weight of the unit (typically 35-55 kg), as this directly affects the reinforcement plan.
Electrical System Assessment and Upgrade (Electricity First, Machine Second!)
1. Taking a 9000 BTU inverter air conditioner as an example, it requires approximately 600W to operate at medium speed. If planned for 4 hours of parking use, it will require 600W × 4h = 2400Wh of power. For a 12V system, at least a 200Ah lithium battery is needed (considering depth of discharge). Lead-acid batteries are generally insufficient.
2. The main power cable from the battery to the air conditioner must be thick enough. It is recommended to use 10 AWG (approximately 6 square millimeters) or thicker pure copper wire. A DC circuit breaker and fuse of appropriate amperage should also be provided.
3. Sufficient solar panels (400W or higher recommended) and a high-power vehicle charger must be provided to supplement power consumption.
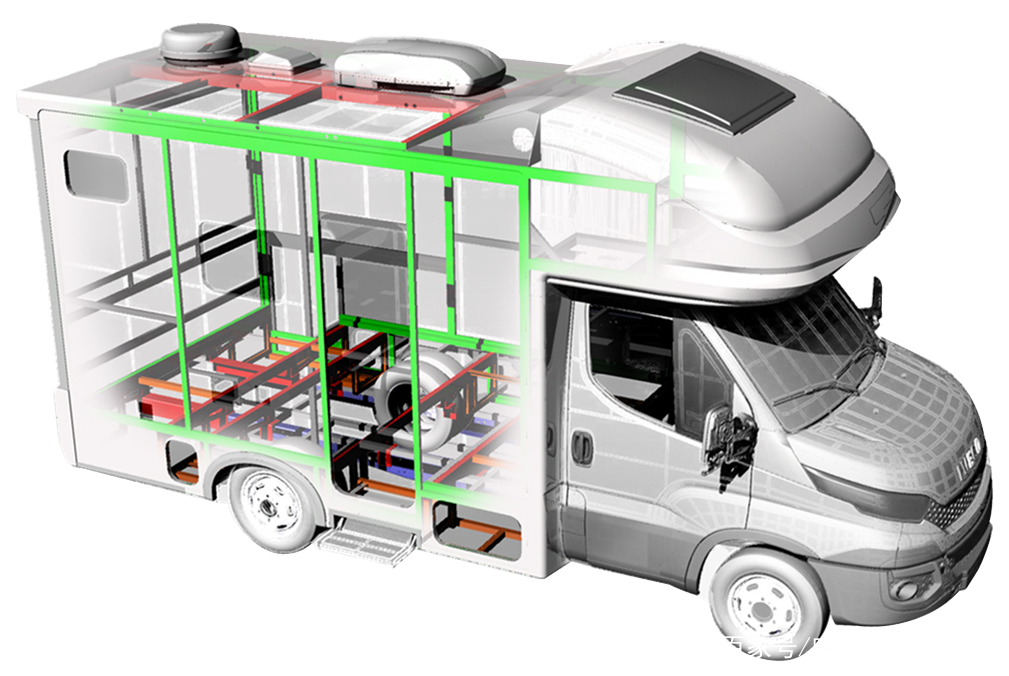
Determining the Installation Location
1. Prioritize a location slightly forward of the center of the vehicle compartment. This is beneficial for airflow distribution.
2. Avoid the sunroof, roof reinforcement ribs (protruding parts), and original vehicle air conditioning pipes.
3. Ensure sufficient ventilation space around the air conditioner and no obstructions in front.
Phase 2 Ac Motorhomes Professional Installation Core Steps
Step 1: Reinforcing the Internal Roof Structure (Lifeline)
Method: At the planned installation location, weld or rivet a “well” or “square” shaped reinforcement frame to the inside of the roof sheet metal. The frame must be securely connected to the existing side beams or pillars of the vehicle body.
Purpose: To distribute the static weight of the air conditioner and the dynamic impact force during driving onto the vehicle frame, preventing roof tearing. Ac Motorhomes designs and installs; visit www.busclima.com or contact busclima@kingclima.com for more technical support.
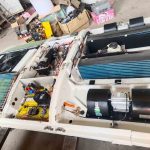
Step 2: Roof Opening and Sealing
1. Precisely drill an opening in the center of the reinforcement area according to the air conditioner mount dimensions.
2. Apply anti-rust paint to the edges of the opening.
3. Apply automotive-grade polyurethane structural sealant evenly to the contact surface between the air conditioner base and the vehicle roof.
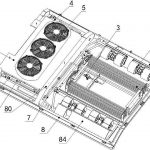
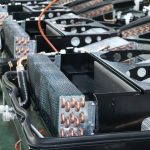
Step 3: Install the Outdoor Unit and Connect the Circuit
1. Place the air conditioner outdoor unit into the base and use stainless steel screws or bolts to pass through the roof sheet metal and directly lock it to the internal reinforced frame. All screw holes should be sealed with sealant.
2. Connect the main line to the battery positive and negative terminals. Be sure to install an air switch and fuse.
3. All wiring terminals must use copper wire lugs and be sealed and insulated with heat shrink tubing. Avoid simple tangling.
4. Properly route and secure the control wiring harness.
Step 4: Indoor Air Duct and Vent Layout (Key to Comfort)
Optimal Solution: Use a short air duct or plenum box, connecting two adjustable vents.
Vent 1: Located behind the driver’s seat, blowing towards the side or slightly upwards towards the passenger area, avoiding direct airflow.
Vent 2: Located in the middle to rear of the vehicle, blowing towards the rear.
Return Air Vent: Required! The optimal location is directly below the indoor unit of the air conditioner or in the cabinet door under the seat, with a sufficiently large area.
Step 5: Vacuuming and Refrigerant Charging (Professional Technician Only)
If the air conditioner is a split type (indoor and outdoor units are separate), this step must be performed by a certified person. Ac Motorhomes designs and installs; visit www.busclima.com or contact busclima@kingclima.com for more technical support.
Process: Connect pipes → Vacuum for at least 30 minutes → Pressure test and leak check → Charge refrigerant precisely according to the nameplate specifications.
Step 6: Comprehensive Testing and Final Sealing
Electrical Test: Power on the air conditioner and test the fan speed, cooling/heating modes, and temperature control for proper functioning.
Performance Test: Run the air conditioner and measure the temperature difference at the air outlet (should be >10°C). Check for proper drainage.
Final Waterproofing: Apply an additional layer of sealant to all screw heads and seams.
Water Spray Test: Simulate heavy rain and subject the area around the air conditioner to prolonged water spray to check for leaks inside the vehicle.
Road test: Short-distance driving to check for any abnormal noises or looseness.
Related posts:
 Bus Air Conditioner is used for buses and medium-sized commercial vehicles
 Air Conditioner In Camper
 Camper Air Conditioner
 Installing an RV Air Conditioner on a Minibus
 Introduction to Ac For Bus
 Rv Ac Unit Repair
 Ac For Camper and Mini Bus Ac Installation Steps
 Fixing Rv Air Conditioner
 Ac Unit For RV Camper: Air Conditioning System for Minibuses and Motorhomes