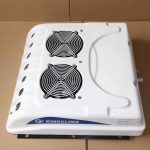
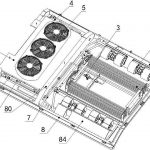
How to Recharge Auto AC? Replacing the air conditioning unit in a commercial vehicle is a systematic project, far more complex and specialized than that in passenger cars. The first step is accurate diagnosis and thorough preparation. Commercial vehicle (such as trucks and buses) air conditioning systems or Camper Air Conditioner are typically more powerful, with longer piping, and may be equipped with an independent engine-driven rooftop unit or a dual evaporator system. Fault diagnosis must utilize a combination of pressure gauges, electronic leak detectors, and circuit testing tools to accurately determine whether the leak is in the evaporator core, the condenser is blocked, or the compressor assembly is damaged. Once unit replacement is determined, fully compatible original or high-quality equivalent parts must be purchased based on the vehicle brand, engine model, and body structure. Simultaneously, a complete set of professional tools must be prepared, including but not limited to a refrigerant recovery and charging machine, vacuum pump, torque wrench, a full set of piping wrenches, and personal protective equipment. Adequate preparation is fundamental to ensuring efficient and standardized subsequent procedures.

How to Recharge Auto AC – Safe Recycling and Standardized Disassembly Procedures
After establishing a safe working environment (ventilation, fire prevention) and disconnecting the vehicle’s main power supply, the first step in the process is to legally and compliantly recover the refrigerant. Certified recycling equipment must be used to completely remove and properly dispose of any residual refrigerant in the system; this is a mandatory requirement of environmental regulations. The disassembly sequence must follow the principle of “outside to inside, electrical circuits first, then piping”: first disconnect the relevant wiring harnesses and sensor plugs and mark them, then disconnect the compressor belt or coupling. Disassembling the evaporator unit often requires removing part of the interior trim panels or dashboard; disassembling the condenser unit requires carefully removing the front grille and related brackets. All open piping connections must be immediately sealed with dedicated sealing plugs to absolutely prevent dust and moisture from entering the system. The standardization of this procedure directly determines the lifespan of the new unit and the cleanliness of the system.
How to Recharge Auto AC – New Unit Installation and Sealing Guidelines
Installation is central to rebuilding system reliability. Before installing the new unit, the inside of the connecting pipes must be thoroughly cleaned, and all O-rings at the connections must be replaced. The new O-rings should be coated with refrigerant-compatible refrigeration oil. When installing the condenser, ensure sufficient heat dissipation clearance between it and the intercooler and water tank, and that the fan does not interfere with its operation. When installing the evaporator, ensure the condensate drain pipe is unobstructed and securely installed to prevent leaks inside the vehicle. For belt-driven units such as compressors, use a special tool to adjust the belt tension to the specified value; excessive looseness or tightness will lead to premature damage. All bolts and pipe fittings should be tightened using a torque wrench, strictly following the torque values specified in the service manual, step-by-step and cross-tightening. This is the most critical mechanical operation to prevent leaks.
How to recharge Auto AC – System Vacuuming and Precise Charging Operation: After all units are installed and connected, the system must undergo rigorous sealing verification and environmental elimination. Connect the high and low pressure ports of the dual pressure gauges to the system service valve, with the intermediate pipe connected to the vacuum pump. Start the vacuum pump for deep vacuuming, typically for at least 45 minutes (longer may be required for large commercial vehicle systems), to completely remove air and moisture from the system. Then close the valves and perform a pressure test for leaks. If the pressure gauge reading remains stable within 15 minutes, the system is well-sealed. Afterward, accurately weigh and charge the refrigerant using an electronic scale according to the type and amount specified on the vehicle nameplate or in the manual. During recharging, the engine must be started and the air conditioning turned on. The relationship between the high and low pressure gauge readings and the ambient and vent temperatures must be monitored in real time to ensure the data meets the vehicle’s technical standards.
How to Recharge Auto AC – Comprehensive Performance Verification and Pre-Delivery Confirmation: After recharging, multi-dimensional, full-load performance testing must be conducted. Testing should be performed under normal engine operating conditions, measuring the vent temperature at different fan speeds. Under standard ambient temperature, the stabilized vent temperature should typically be between 8-12 degrees Celsius. Simultaneously, listen to the operating sounds of the compressor, fan, and other components to ensure they are operating normally, and check the condenser fan’s start-stop logic for correctness. Use an infrared thermometer to check the temperature difference at various points in the piping to ensure there are no abnormal blockages. Finally, an electronic leak detector must be used to perform a final leak check on all repaired interfaces. After all tests pass, a road test is recommended to simulate the system’s performance under high-pressure conditions such as hill climbing and idling. Given the high value and operational importance of commercial vehicle air conditioning systems, this work is strongly recommended to be performed by a professional service provider with heavy vehicle repair qualifications and specialized equipment to ensure the long-term reliability and safety of the system.