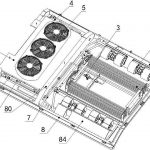
RV AC Unit Repair is relatively complex, involving both the vehicle engine-driven (driving air conditioning) and parking power-driven (parking air conditioning) systems. Repair requires a systematic troubleshooting process. Below are detailed troubleshooting and repair steps, divided into two parts: Initial Self-Troubleshooting and Professional Repair Advice.
RV AC Unit Repair – Initial Self-Troubleshooting (Safe and Simple Checks)
Before contacting a professional repairman, you can perform the following checks, which may quickly resolve minor issues or provide crucial information for the mechanic.
1. Identify the Fault Symptoms
Completely not working (no airflow, no sound): Most likely a power issue.
Airflow, but not cold: May indicate a refrigerant leak, a malfunctioning compressor, or a condenser problem.
Low airflow: Usually a clogged filter or a blower problem.
Abnormal noise: May indicate foreign objects inside the blower, a damaged blower bearing, or a compressor malfunction.
Only blowing natural air without cooling: May indicate a refrigeration cycle malfunction.
2. Check Power Supply and Fuses (Applicable to All Air Conditioners)
Vehicle Air Conditioner (Driven by Engine): Ensure the vehicle is started, the air conditioner switch is pressed, and the temperature is set to the lowest setting.
Parking Air Conditioner (Driven by RV Living Battery/External Ambient Power):
Check that the RV living battery has sufficient power (check via the control panel).
If using external Ambient Power, ensure the power outlet has power and the cables are securely connected.
The most important step: Check the fuses/circuit breakers. Locate the fuse box near the RV’s power control panel or battery. Find the fuse and circuit breaker corresponding to “Air Conditioner” or “A/C” and check for blown or tripped fuses. This is one of the most common problems.
3. Check Air Conditioner Filter and Intake/Exit Vents
Locate the air conditioner return vent (usually inside the vehicle) and remove the filter. If it is covered in dust or catkins, it will severely affect airflow and cooling efficiency. Clean or replace it with a vacuum cleaner.
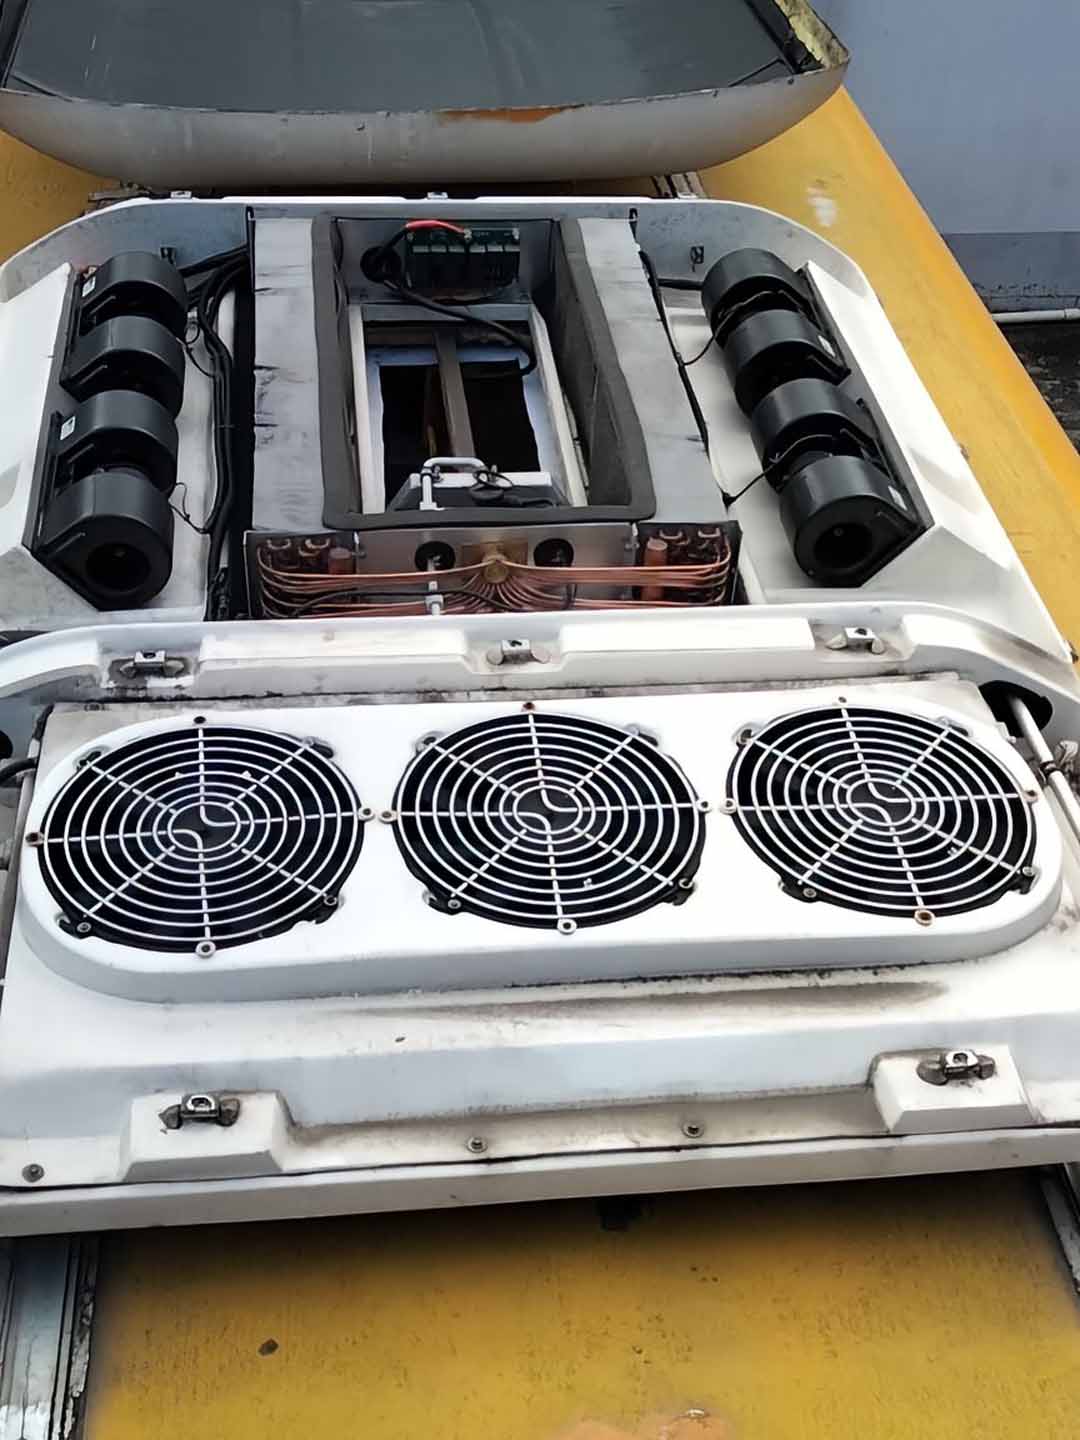
Check the air conditioner outdoor unit condenser vents on the exterior of the vehicle (roof or side wall). Ensure they are not obstructed by debris or luggage, and that the fins are clean. Poor heat dissipation can lead to a sharp drop in cooling efficiency or even high-pressure protection shutdown.
4. Listen and Observe
When turning on the air conditioner, listen carefully:
Is the blower running? Is there a sound of airflow?
Driving Air Conditioner: Does the electromagnetic clutch next to the air conditioner compressor in the engine compartment make a “click” sound? Does the compressor rotate with the pulley?
Parking Air Conditioner: Does the outdoor unit on the roof vibrate and make a fan sound when starting?
Observe the windows and instruments: Are there any fault codes displayed?
Rv Ac Unit Repair – Common Fault Causes and Professional Repair Advice
If the problem persists after completing the above checks, it may be due to the following deeper issues, and it is strongly recommended to have it inspected by a professional.
A. Driving Air Conditioner Fault (Engine Driven)
Refrigerant Leakage: This is the most common cause. Leaks may occur at pipe joints, condenser, compressor shaft seals, etc., due to aging. Professional leak detection equipment is needed to locate the leak, repair it, vacuum the system, and add refrigerant according to the standard (e.g., R134a).
Compressor Fault: Damaged electromagnetic clutch, internal wear, etc. Professional diagnosis is required, and replacement is usually necessary.
Air conditioning pressure switch/sensor malfunction: Abnormal system pressure (too high or too low) triggers protection, cutting off compressor operation. Fault codes need to be read and a pressure gauge checked.
Condenser/evaporator blockage or damage: The condenser is punctured and leaking, or the evaporator is frozen. Cleaning or replacement is required.
Pipe blockage or expansion valve malfunction: This prevents refrigerant from circulating properly. Professional cleaning or component replacement is required.
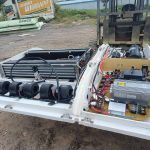
B. Parking air conditioning malfunction (mostly roof-mounted, battery/mains power driven)
Control board malfunction: The air conditioner’s “brain” is damaged and cannot issue correct commands. This manifests as malfunction or complete unresponsiveness. Professional technician inspection or replacement of the control board is required.
DC compressor or motor malfunction: Parking air conditioners use DC inverter or fixed-frequency compressors; damage requires complete replacement.
Fan motor damage: The indoor or outdoor fan does not rotate, resulting in no cooling or poor heat dissipation.
Refrigerant leakage: Similar to vehicle air conditioners, but with shorter piping, often concentrated in the roof unit.
Power Module Failure: The component that converts DC power to the voltage required by the compressor is damaged.
RV AC Unit Repair – Repair Channels and Precautions
Choose a Professional Repairer
Prioritize RV conversion shops/service centers: They are most familiar with RV integrated systems, especially parking air conditioning.
Large Truck/Bus Repair Stations: Specialize in handling the air conditioning systems of minibus chassis.
Professional Automotive Air Conditioning Repair Shops: Can handle the air conditioning system of vehicles, but may not be familiar with RV parking air conditioning.
Preparation Before Repair
Accurate Description: Clearly describe the fault to the repair technician (when it occurred, under what circumstances, what the sound was like, etc.).
Inform about History: Has refrigerant been recently added? Has there been a collision or repair?
Provide Vehicle Information: Minibus chassis model (e.g., Ford Transit, Iveco, etc.), RV conversion manufacturer, parking air conditioning brand and model.
RV AC Unit Repair – Safety Warning
Non-professionals should not: Disassemble the air conditioning system pipes or compressor yourself. Refrigerant is dangerous under high pressure and requires special tools for recovery; indiscriminate discharge also pollutes the environment.
Always disconnect the power supply (disconnect the battery negative terminal) when working on the roof.
Please exercise extreme caution when working on the roof to prevent falls.
Summary: Repair Flowchart (Suggested Steps)
Identify the Fault → Is the air conditioner not cooling in the vehicle? Or is the parking air conditioner not working?
Self-Troubleshooting → Check the power supply, fuses, filter, and vents.
Initial Assessment
Completely No Response → Focus on checking the power supply, fuses, and main board.
Air Flow but No Cooling → Focus on checking the refrigerant, compressor, and cooling system.
Seek Professional Assistance → Contact the appropriate professional repair shop based on the fault type.
Thorough Repair and Maintenance → After repair, a complete inspection and maintenance is recommended, including cleaning the condenser and replacing the filter to ensure long-term stable operation.
Hopefully, this detailed guide will help you locate the problem and communicate effectively with repair personnel to restore your RV’s air conditioner to normal operation as soon as possible!