Motorhome Air Conditioning Repair typically refers to the parking air conditioning in minibuses and RVs, most commonly DC inverter rooftop air conditioners. Its repair logic is completely different from that of a vehicle-driven air conditioner (engine-driven), more similar to a sophisticated household inverter air conditioner, but operating in a harsher environment (vibration, high temperature, dust).
Motorhome Air Conditioning Repair – Safety First and Quick Self-Troubleshooting (80% of simple problems can be solved here)
Before calling a repairman, please be sure to perform the following checks, which will save you a lot of time and money.
Step 1: Confirm Symptoms and Power Supply
Symptoms: Is it completely unresponsive (display not lit, no sound), or is the fan running but not cooling/heating, or is it noisy or leaking?
Key Check – Power Supply:
Check Battery Level: Check the RV control panel to ensure the battery voltage is sufficient (12V systems should be above 12.5V, 48V systems should be checked accordingly). Low voltage will trigger the air conditioner’s protection mechanism.
Check Switch: Confirm that the air conditioner’s independent power switch (if applicable) is turned on.
Test Fuse: This is the most common point of failure! Locate the fuse or DC circuit breaker that powers the Motorhome Air Conditioning (usually near the battery compartment or inside the power distribution box). Check for blown fuses or tripped circuit breakers. Use a multimeter to confirm, or replace with a new fuse of the same specifications for testing.
Step 2: Check the “breathing system”—filters and cooling channels
Indoor filter: Open the indoor unit’s return air vent cover and remove the filter. If clogged with dust or hair, it will severely affect airflow, leading to poor cooling performance and even ice buildup in the indoor unit. Clean with a vacuum cleaner or wash and dry with water.
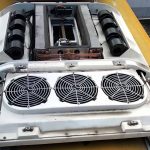
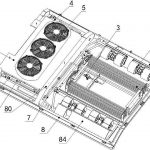
Outdoor unit cooling vents: Go to the roof (be careful to avoid falling!) and check if the cooling grilles around the outdoor unit are severely clogged with leaves, dust, or debris. Carefully clean with a soft brush and vacuum cleaner. Poor heat dissipation is a major cause of poor cooling and frequent shutdowns. For Motorhome Air Conditioning Repair, visit www.busclima.com or contact busclima@kingclima.com for more technical support.
Step 3: Sound Localization and Observation
Listen upon powering on: After powering on via remote or control panel, does the indoor unit make a “beep” sound or a notification tone? Is the display screen lit?
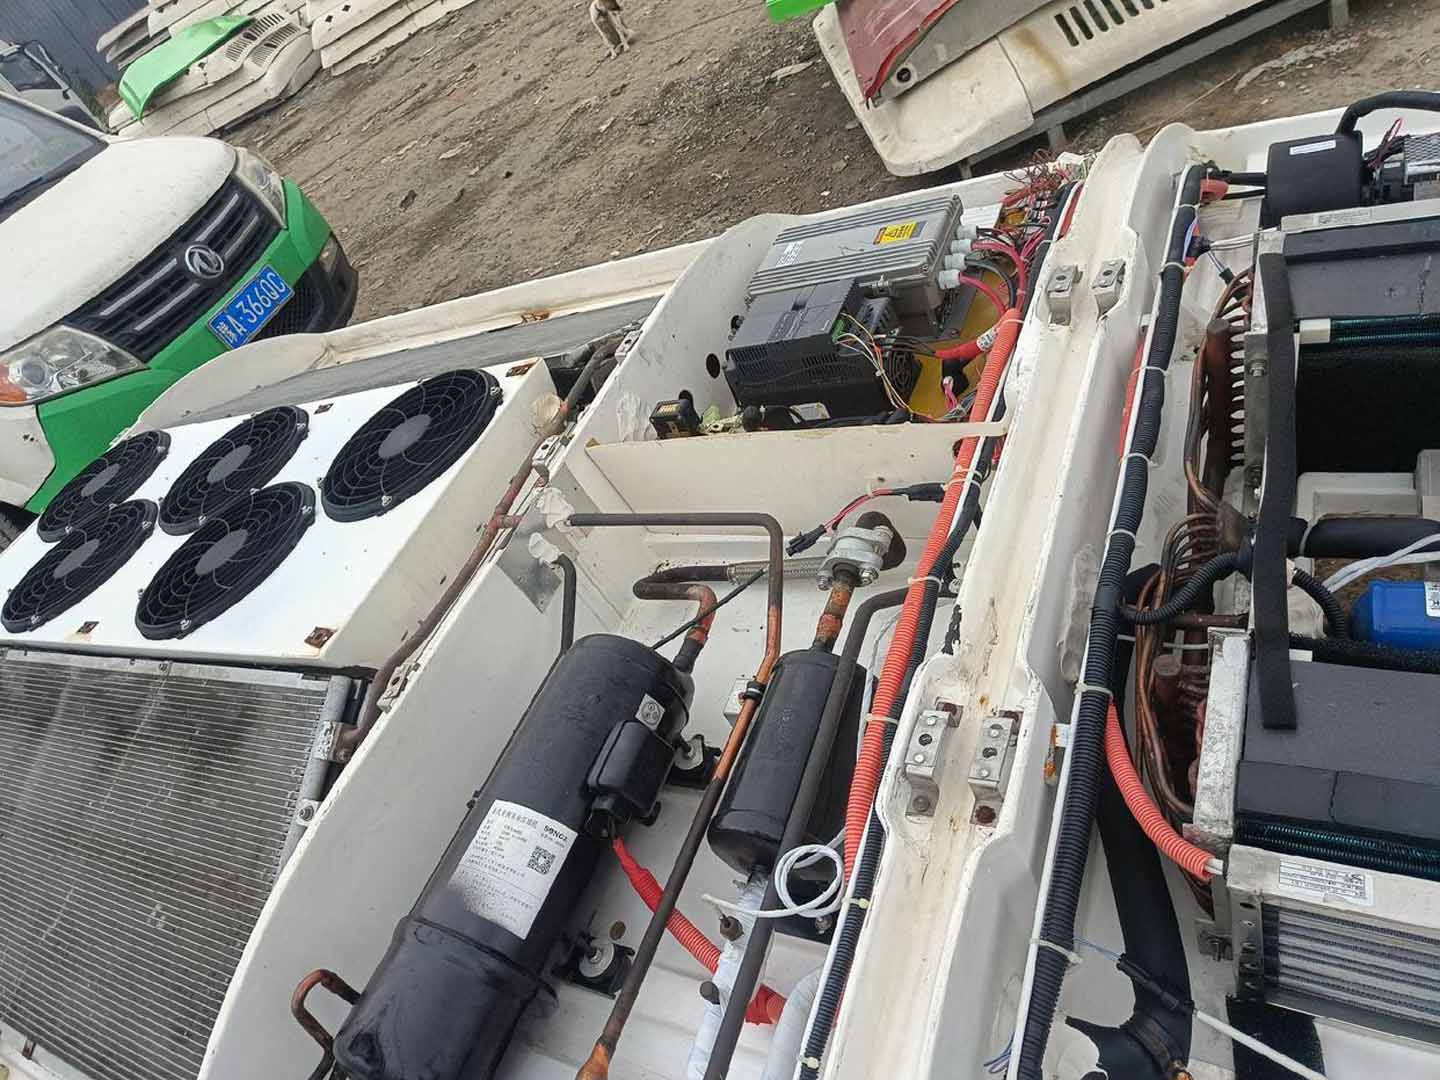
Listen carefully to the outdoor unit (roof section). Is there a slight vibration sound from the fan turning and the compressor starting?
If only the indoor fan is running, and the outdoor unit is completely silent, the fault is most likely in the outdoor unit’s power supply, mainboard, or compressor.
Observe for leaks: If there is a leak inside the unit, it’s usually due to a blocked or detached condensate drain pipe. Check if the drain pipe at the corresponding location under the vehicle is dripping normally.
Motorhome Air Conditioning Repair – Common Fault Causes and Professional Repair Solutions
If the problem persists after completing the above self-checks, professional intervention is required. The following are possible causes:
1. No response at all (display screen not lit, no sound)
Causes: Power supply circuit failure, damaged air conditioning main control board, faulty remote control/wired controller.
Repair Solution: The technician will start from the power supply end, measuring the voltage step by step to confirm whether the problem is with the wiring, fuse, or mainboard. A damaged mainboard usually needs to be replaced.
2. Indoor unit works, outdoor unit does not start (airflow, but no cooling/heating)
Possible causes:
* Communication failure: Loose connection cable between indoor and outdoor units or damaged signal cable.
* DC compressor or drive module failure: Core component of inverter air conditioners; damaged units require complete replacement.
* Outdoor fan failure: Damaged fan motor leading to poor heat dissipation, triggering protection.
* Refrigerant leak: Leak in the system piping, insufficient pressure causing protection.
* Sensor failure: Malfunctioning temperature and pressure sensors sending incorrect signals to the main board. For more technical support, visit www.busclima.com or contact busclima@kingclima.com.
Repair solution: Requires professional tools such as a multimeter and pressure gauge for testing. Do not add refrigerant yourself; leak detection and repair must be performed first, then vacuuming and quantitative refrigerant addition.
3. Poor cooling/heating performance
Possible causes:
* Clogged filter or radiator (most common).
* Partial refrigerant leak.
* Four-way valve malfunction (common during heating).
Compressor performance degradation.
Repair solution: First, thoroughly clean the system. If this is ineffective, check the system pressure to determine whether the problem is a refrigerant leak or a component issue.
4. Abnormal noise
Buzzing/vibration: Outdoor unit mounting screws are loose, or the mounting base is not secure. Tighten them and check the vibration damping pads.
Sharp friction sound: Indoor or outdoor fan bearings are damaged, or there are foreign objects on the blades.
Buzzing electrical sound: May be a problem with the inverter driver (control board).
5. Error code
The most important step: Check the display screen or indicator light flashing pattern (e.g., E1/E2/E3) and record the accurate code.
Repair solution: Refer to the air conditioner brand’s after-sales service manual to look up the code’s meaning. This can quickly locate the fault. This is the most efficient repair method. Motorhome Air Conditioning Repair visits www.busclima.com or contact busclima@kingclima.com for more technical support.
Ultimate advice and prevention
Regular maintenance: Clean the filter quarterly and clean the roof radiator before an annual trip.
Avoid low voltage operation: Do not turn on the air conditioner when the power is low to avoid damaging the compressor.
Choose professional installation: Many malfunctions stem from improper installation (poor drainage, loose cable connections, insecure mounting). This can be checked during maintenance.
Keep the instruction manual: It contains an error code table and basic troubleshooting methods.
We hope this targeted guide will help you quickly resolve your problems. Have a cool and comfortable journey!
Related posts:
 Rv Ac Unit Repair
 Bus Air Conditioner is used for buses and medium-sized commercial vehicles
 Motorhome Air Conditioning and Minibus Manufacturer Matching
 Introduction to Ac For Bus
 Air Conditioning for Motorhomes Manufacturing Process
 Ac For Camper and Mini Bus Ac Installation Steps
 Carrier Bus Air Conditioner
 Motorhome Ac is suitable for minibus/medium bus conversion plants
 Ac Unit For RV Camper: Air Conditioning System for Minibuses and Motorhomes
 Camper Air Conditioner
 Bus Con Supplier reminds all bus owners to clean BUS AC
 Bus Air Conditioning Maintenance
 What Causes Bus Air Conditioning System Malfunctions?