RV Camper Ac Installation on the roof of a converted minibus is a complex undertaking, and the quality of the installation directly determines the air conditioner’s efficiency, lifespan, and safety. Careful planning is essential. If you are not an experienced DIY enthusiast, it is strongly recommended that you have the installation done by a professional RV conversion company.
Crucial Planning and Preparation Before RV Camper Ac Installation: Determining the Air Conditioner Model and Power
1. Calculate the required cooling capacity: Choose based on the cubic volume (length × width × height) of your RV’s living area. Typically, 30-50W of cooling capacity is needed per cubic meter. Minibuses have larger spaces, so the mainstream choice is a model with 13,500 BTU (approximately 3.95KW) to 15,000 BTU (approximately 4.4KW).
2. Choose the type: DC inverter air conditioners are more energy-efficient and quieter, but require higher battery power; fixed-frequency air conditioners are cheaper, but have a higher starting current. For minibuses, DC inverters are the better choice.
Assess and Upgrade the Power Supply System (Top Priority!)
1. Calculate Power Consumption: For example, a 1500W air conditioner draws up to 125A on a 12V system. Your household battery (lithium-ion recommended) must have sufficient capacity, such as at least a 400Ah 12V lithium battery, to support several hours of operation.
2. Check Cables and Protection: The main cable from the battery to the roof must be thick enough (e.g., at least 25 square millimeters of copper wire for 1500W) and equipped with a matching DC circuit breaker (e.g., 150A) and fuses.
3. Confirm Inverter: If an Air Conditioner For Rv is installed, the inverter’s continuous output power must exceed the air conditioner’s rated power, and it must be able to handle the peak starting power.
Inspect the Roof and Interior Structure
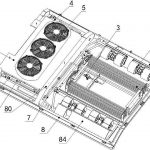
1. Roof Structure: Locate the internal “reinforcing ribs” or “beams” of the roof. The mounting base must be secured to these, never just to the sheet metal.
2. Internal Layout: Determine the location of the indoor unit’s air outlet to ensure airflow covers the main living area and avoids directing airflow onto the beds. Plan the installation locations of the indoor unit’s evaporator, air duct, and control panel.
3. Opening Size: Accurately draw lines on the roof according to the dimensions of the outdoor unit’s base. The opening must avoid any beams, wiring, and existing equipment. Rv Camper Ac is for bus roof installation. Visit www.busclima.com or contact busclima@kingclima.com for more technical support.
Rv Camper Ac Core Installation Steps (Professional Construction Process) Roof Opening and Reinforcement
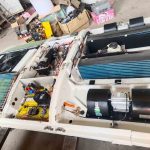
1. Drill a hole at the marked location using professional tools (such as a jigsaw).
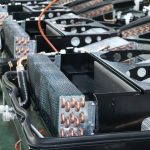
2. Inside the opening, a “reinforcing frame,” made of aluminum or steel, is typically installed and securely connected to the roof beams to distribute the weight of the air conditioner and reduce stress during driving.
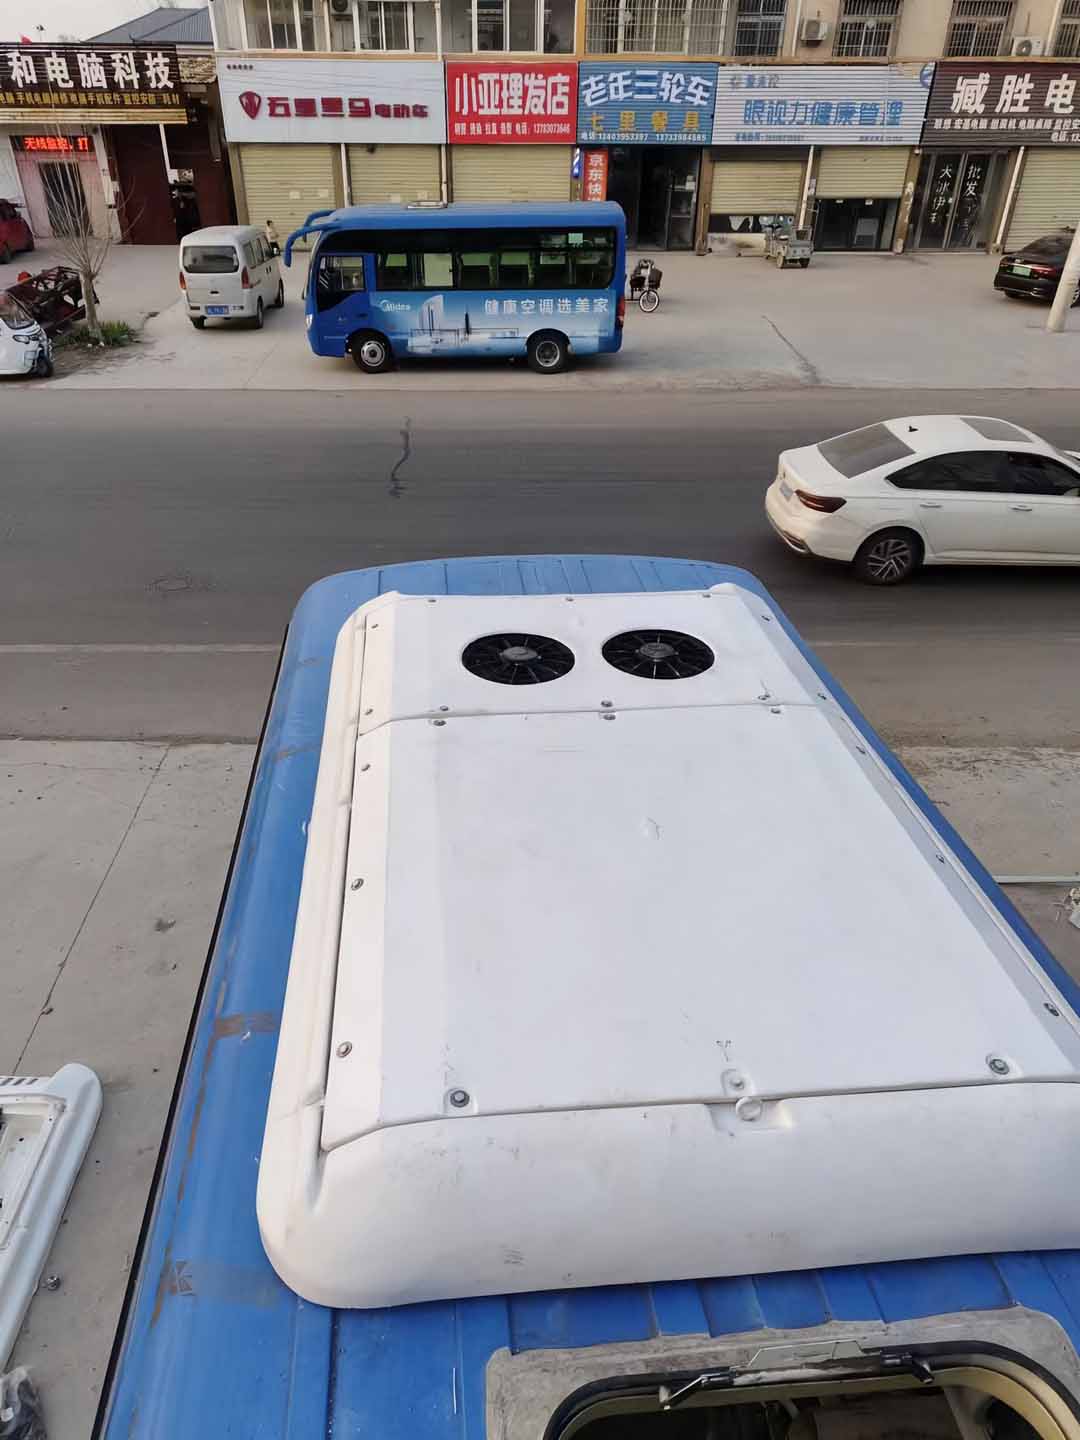
Installing the Outdoor Unit (Roof Section)
1. Align the outdoor unit’s base with the opening.
2. Apply high-quality waterproof sealant (such as polyurethane sealant) between the base and the roof.
3. Securely fasten the base to the roof’s reinforcing frame or crossbeam using stainless steel self-tapping screws or bolts. Ensure close spacing between screws for a secure hold.
4. Connect the refrigerant copper pipes, drain pipe, and power/control harness. Use a professional flaring tool for copper pipe connections to ensure a tight seal.
Installing the Indoor Unit and Ductwork
1. Hoist the indoor unit evaporator unit below the roof opening and connect it to the outdoor unit.
2. Install the air ductwork, connecting it to the various air outlets in the living area. Seal ductwork connections with aluminum foil tape to minimize airflow and cooling loss.
3. Install the return air vent and filter. Rv Camper Ac is for bus roof mounting. Visit www.busclima.com or contact busclima@kingclima.com for more technical support.
Electrical Connections
1. Strictly follow the circuit diagram. Connect the main line to the battery terminal, ensuring correct polarity.
2. All wiring terminals must use crimp lugs and be protected with heat shrink tubing to prevent loosening and oxidation.
3. Install independent power control switches and fuses/circuit breakers.
4. Connect the control panel wiring harness.
Vacuuming and Refrigerant Charging
1. This is the core technology and must be performed by a certified refrigeration technician! Rv Camper Ac is for bus roof mounting. Visit www.busclima.com or contact busclima@kingclima.com for more technical support.
2. Vacuum the entire refrigeration system for at least 30 minutes using a vacuum pump to ensure absolute dryness and no leaks.
3. Add the specified type of environmentally friendly refrigerant (e.g., R410A) according to the precise weight indicated on the air conditioner nameplate.
Comprehensive Testing and Sealing
1. Power-on Test: Test each switch, control panel, fan speed, and cooling/heating mode.
2. Performance Test: Run the air conditioner, measure the temperature difference at the air outlet (should be above 10°C), and check for proper drainage.
3. Final Waterproofing: Apply waterproof sealant again to all screw holes and seams. If possible, conduct a water spray test.
4. Road Test: Drive a short distance to check for any unusual noises or looseness from the air conditioning system when driving on bumpy roads.